Paint is Dolphin Fin by Behr. Coat rack was made by Mark. Vase is Taget. Dried eucalyptus is TJ Maxx. Hat is unknown.

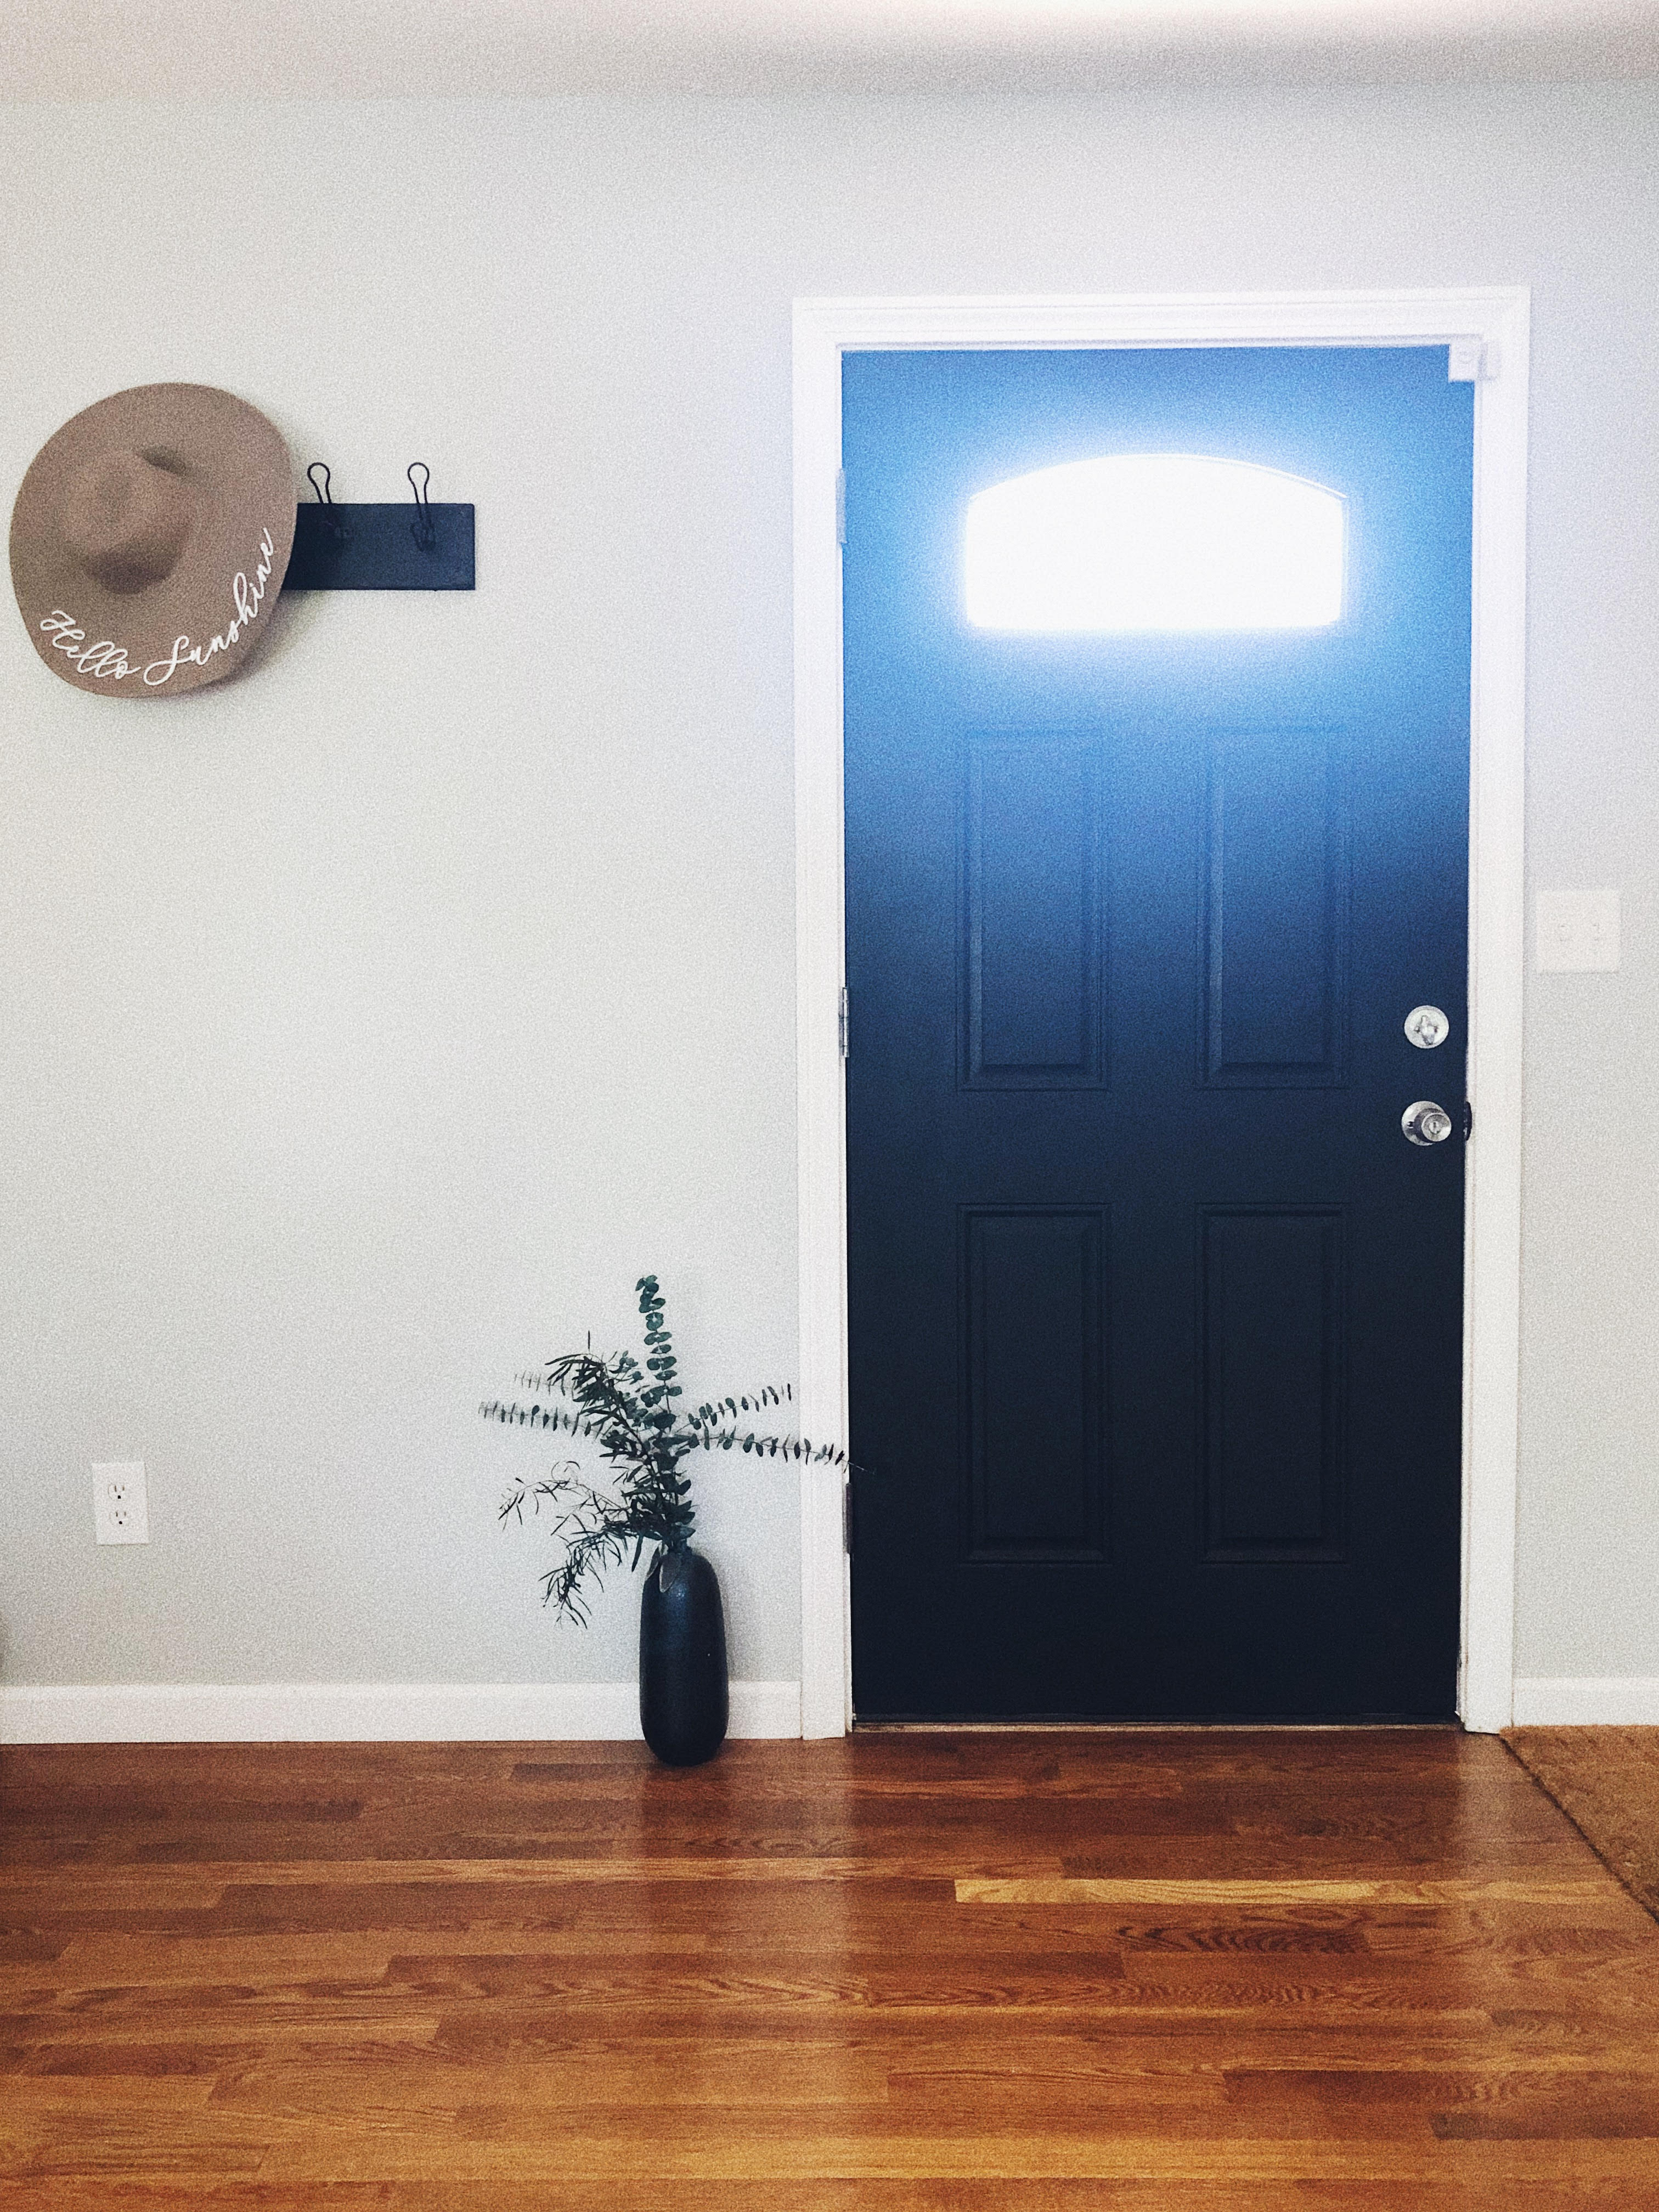
It’s me. Yes, I’m really here. No, you’re not dreaming. It’s been a while, but obviously I’ve just been SO busy painting this door. You know, the door that took a few hours. Yeah, totally busy doing that for the last *unknown amount of time* since I last blogged.

Obviously I don’t have much of an excuse for why I purchased my own domain and then proceeded to fall away from blogging after about approximately four posts. It just, happened. I’m not proud of it, but alas, here I am.

So, this might be a blog post about something that anyone and their mom could figure out on their own, but if you’re anything like me, I had no idea what paint to use on our front door. We wanted to paint the interior and exterior, so we needed a paint that could hold up outdoors and we knew we wanted black. That’s where we started – and it’s just such an easy and cheap way to make a statement in the entry of your home. It gave us a few problems but now that it’s done, we’re happy with it and I love the stark contrast it brought to the interior!

Here are the items we used:

  • Rust-oleum Professional Black Flat Oil-Based Enamel Interior/Exterior Paint ($9)
  • Mini Paint Roller (we already had this but you can find them for less than $5!)
  • High-Density Foam Mini Roller Refill – 2 piece ($5)
  • 2.5in Trylon Thin Angle Flat Paint Brush Set – 2 piece ($17)
  • Paint Trays ($2)

The most expensive part was the paintbrush and in the end, the roller worked SO much better! So, without the paintbrushes, this is about a $20 project. And thaaaaaat’s just what I like to hear.

As far as actually *doing* the project, the first coat was not as easy as I thought it was going to be. Getting into all the crevices and trying to get the paint even was semi-frustrating and more work than we thought. We let it dry for a few days and then I went back to it and tried to keep the roller going the same way and after two applications, we were happy with how it came out! So keep that in mind when you’re planning your future door-painting project. We just put a sheet down, taped off the doorknob, locks and window and were good to go! Also, you have to keep your door open for an extended period of time, so probably not great to do it on a super hot or cold day, unless you’re a fan of torture. I won’t judge you, everyone has their ~thing~.

If you decide to paint your door, I’d love to see it! I think a dark green flat paint would also look reaaaal cute!

Uncategorized

olive tree topiary

Processed with VSCO with a5 preset

Olive tree’s are ~trendy~ right now and I’m all in. (We can ignore the fact that I STRONGLY dislike actual olives) I think my husband would be ab.so.lute.ly. thrilled if we had a real olive tree, but unfortunately for him, I don’t trust my abilities to tend to one. So what did I do? Settled for a miniature DIY olive tree topiary.

When I was in search for a perfect little olive tree, a friend pointed me towards @vintageporch’s DIY post. And oh my gosh, it was so helpful and so perfectly budget friendly! So I decided to set out to create my own.

Mine is definitely a little different from hers, it is shorter and didn’t involve any gluing or tying of any stems (AKA easier so you can be lazier). But both versions are extremely budget friendly and SO cute! So if you’re looking for a different version of this amazing olive tree topiary (how do you even say that?), make sure to check hers out here.

Here are the quick and simple steps I took to complete the tree (and I didn’t take any pictures because, well… newbie blogger here);

*All items were purchased at Hobby Lobby with the exception of potting soil*

  1. First, you need to pick up a few olive leaf stems from Hobby Lobby (or any other craft store!) or if you’re lucky like me – you’ll find a perfect little bunch of stems tied together for you. The one I used is linked here (olive leaf bunch) and it helps to wait until Hobby Lobby has a sale on floral & greenery stems, this baby was 50% off when I went (I got it for $5)! If you buy separate stems, you’ll just need to find a way to tether them together.
  2. You’ll need a piece of foam. It doesn’t matter what shape or size, as long as it’s strong enough to hold your stems. I bought one square piece and put (shoved) it into my pot. If you can find a round piece that fits perfectly, then yeah, that’s probably ideal. But not a requirement! Here’s a link to a cheap piece (they range from $1-$4) at Hobby Lobby (floral foam).
  3. You’ll also need a pot, and this part is up to you! The pot can fit whatever style you’re going for. I wanted to stay traditional and go with a terra cotta pot, I thought it would look nice with the olives and give it a mediterranean type feel. Why? Not sure, seeing as it doesn’t match the style of anything else in my house but hey, it is what it is. I found some small pots in the clearance section at Hobby Lobby and it was literally $2.50. I’ve linked a larger size pot, incase you’re going for a bigger size, but honestly you can find small terra cotta pots anywhere for pretty cheap. Example linked (terra cotta pot).
  4. Lastly, You’re going to want to cover that foam up with dirt. Yes, dirt. For your fake plant. It gives it a more authentic look. I had some potting soil in my basement, so I took a small scoop and filled the space in the terra cotta pot and then lightly covered the foam. You can use dirt from outside if you’d like, making this step ultimately free of charge. Otherwise, you can find small bags at pretty much any department store, but I’ve linked a small bag from Target for under $5 (potting soil).

I think this project cost me a total of $11. And so worth it!

Processed with VSCO with a5 preset

This is how I’ve styled my DIY olive tree topiary in my home – it’s on my kitchen counter! And I’m obsessed. And the easy thing about this project is that if you ever want to change your style, you can change the pot at any time! Just replace the potting soil over the top and you’ll be good to go. Making this plant versatile and ready to move into any room. Honestly, I’d like to have one in EVERY room, but that’s a bit excessive… right?

If you decide to make one of these, please let me know! Show me your pictures and how you changed it up dependent on YOUR style! Click the + below to follow me and feel free to comment with your ideas!

home